One of the biggest aspects of interior design is understanding how a client will use their space and that goes all the way to the inside of the cabinetry. One of our goals is to help clients get more organized and have more useful storage.
I’ve got some tips here to share that mostly concern cabinetry, and I think, especially if you’re considering a remodel soon, you might find these interesting.
1 - Wire Management
Wire management is needed here! This is stressful to see! #wiremanagement
One of Pinterest’s most searched items last year was “wire management”.
Apparently, it’s quite unsettling to see a wad of wires lying out on the floor, catching dust bunnies, tripping up the pets, and in general, scrambling your visual field. I know it bothers me!
One of my clients’ main priorities when we remodeled her home office was to hide the wires and cords. If you have a desktop made of wood with outlets below that you’re stretching cords all over trying to get to outlets, then drill a hole and use a plastic grommet. You can then thread the cord through to reach the outlet, keeping the cords off the desktop and out of the way.
I have one in my desktop at home and several on our worksurfaces in the office. These are great for items that are plugged in all the time, like desktop computers, printers, etc.
7 Tips To Tweak Your Cabinetry For Better Organization - Home office built in desk with wire management shelf located just under the desktop. #wiremanagement #desk #homeoffice #builtindesk
Use a small shelf with a lip, like we did in this project above, located on the back wall under the countertop, to guide the cords over to a cabinet that might have other equipment you need to connect to. With a hole drilled into the side of the cabinet, the cords can enter there and stay out of sight.
They’re easy to manage without crawling under the desk and tacking them up out of the way.
Outlets for charging phones need to be up top and accessible. If you’re going to charge a phone with a particular outlet, make sure it’s conveniently located and on top of a countertop or inside a drawer where you can lay your phone.
7 Tips To Tweak Your Cabinetry For Better Organization - Electrical outlet inside cabinet for hand vac to remain charging. #cabinetorganization
Outlets located inside cabinets are a wonderful thing!!
If you think you might need to keep anything plugged in somewhere that would be good to be out of sight, installing an outlet inside the cabinet on the side or back wall works.
When I remodeled my own kitchen, I built this little landing station cabinet at the back door to the garage. I have my hand vac charging inside there and it's convenient but I don't have to see it or it's cords out anywhere.
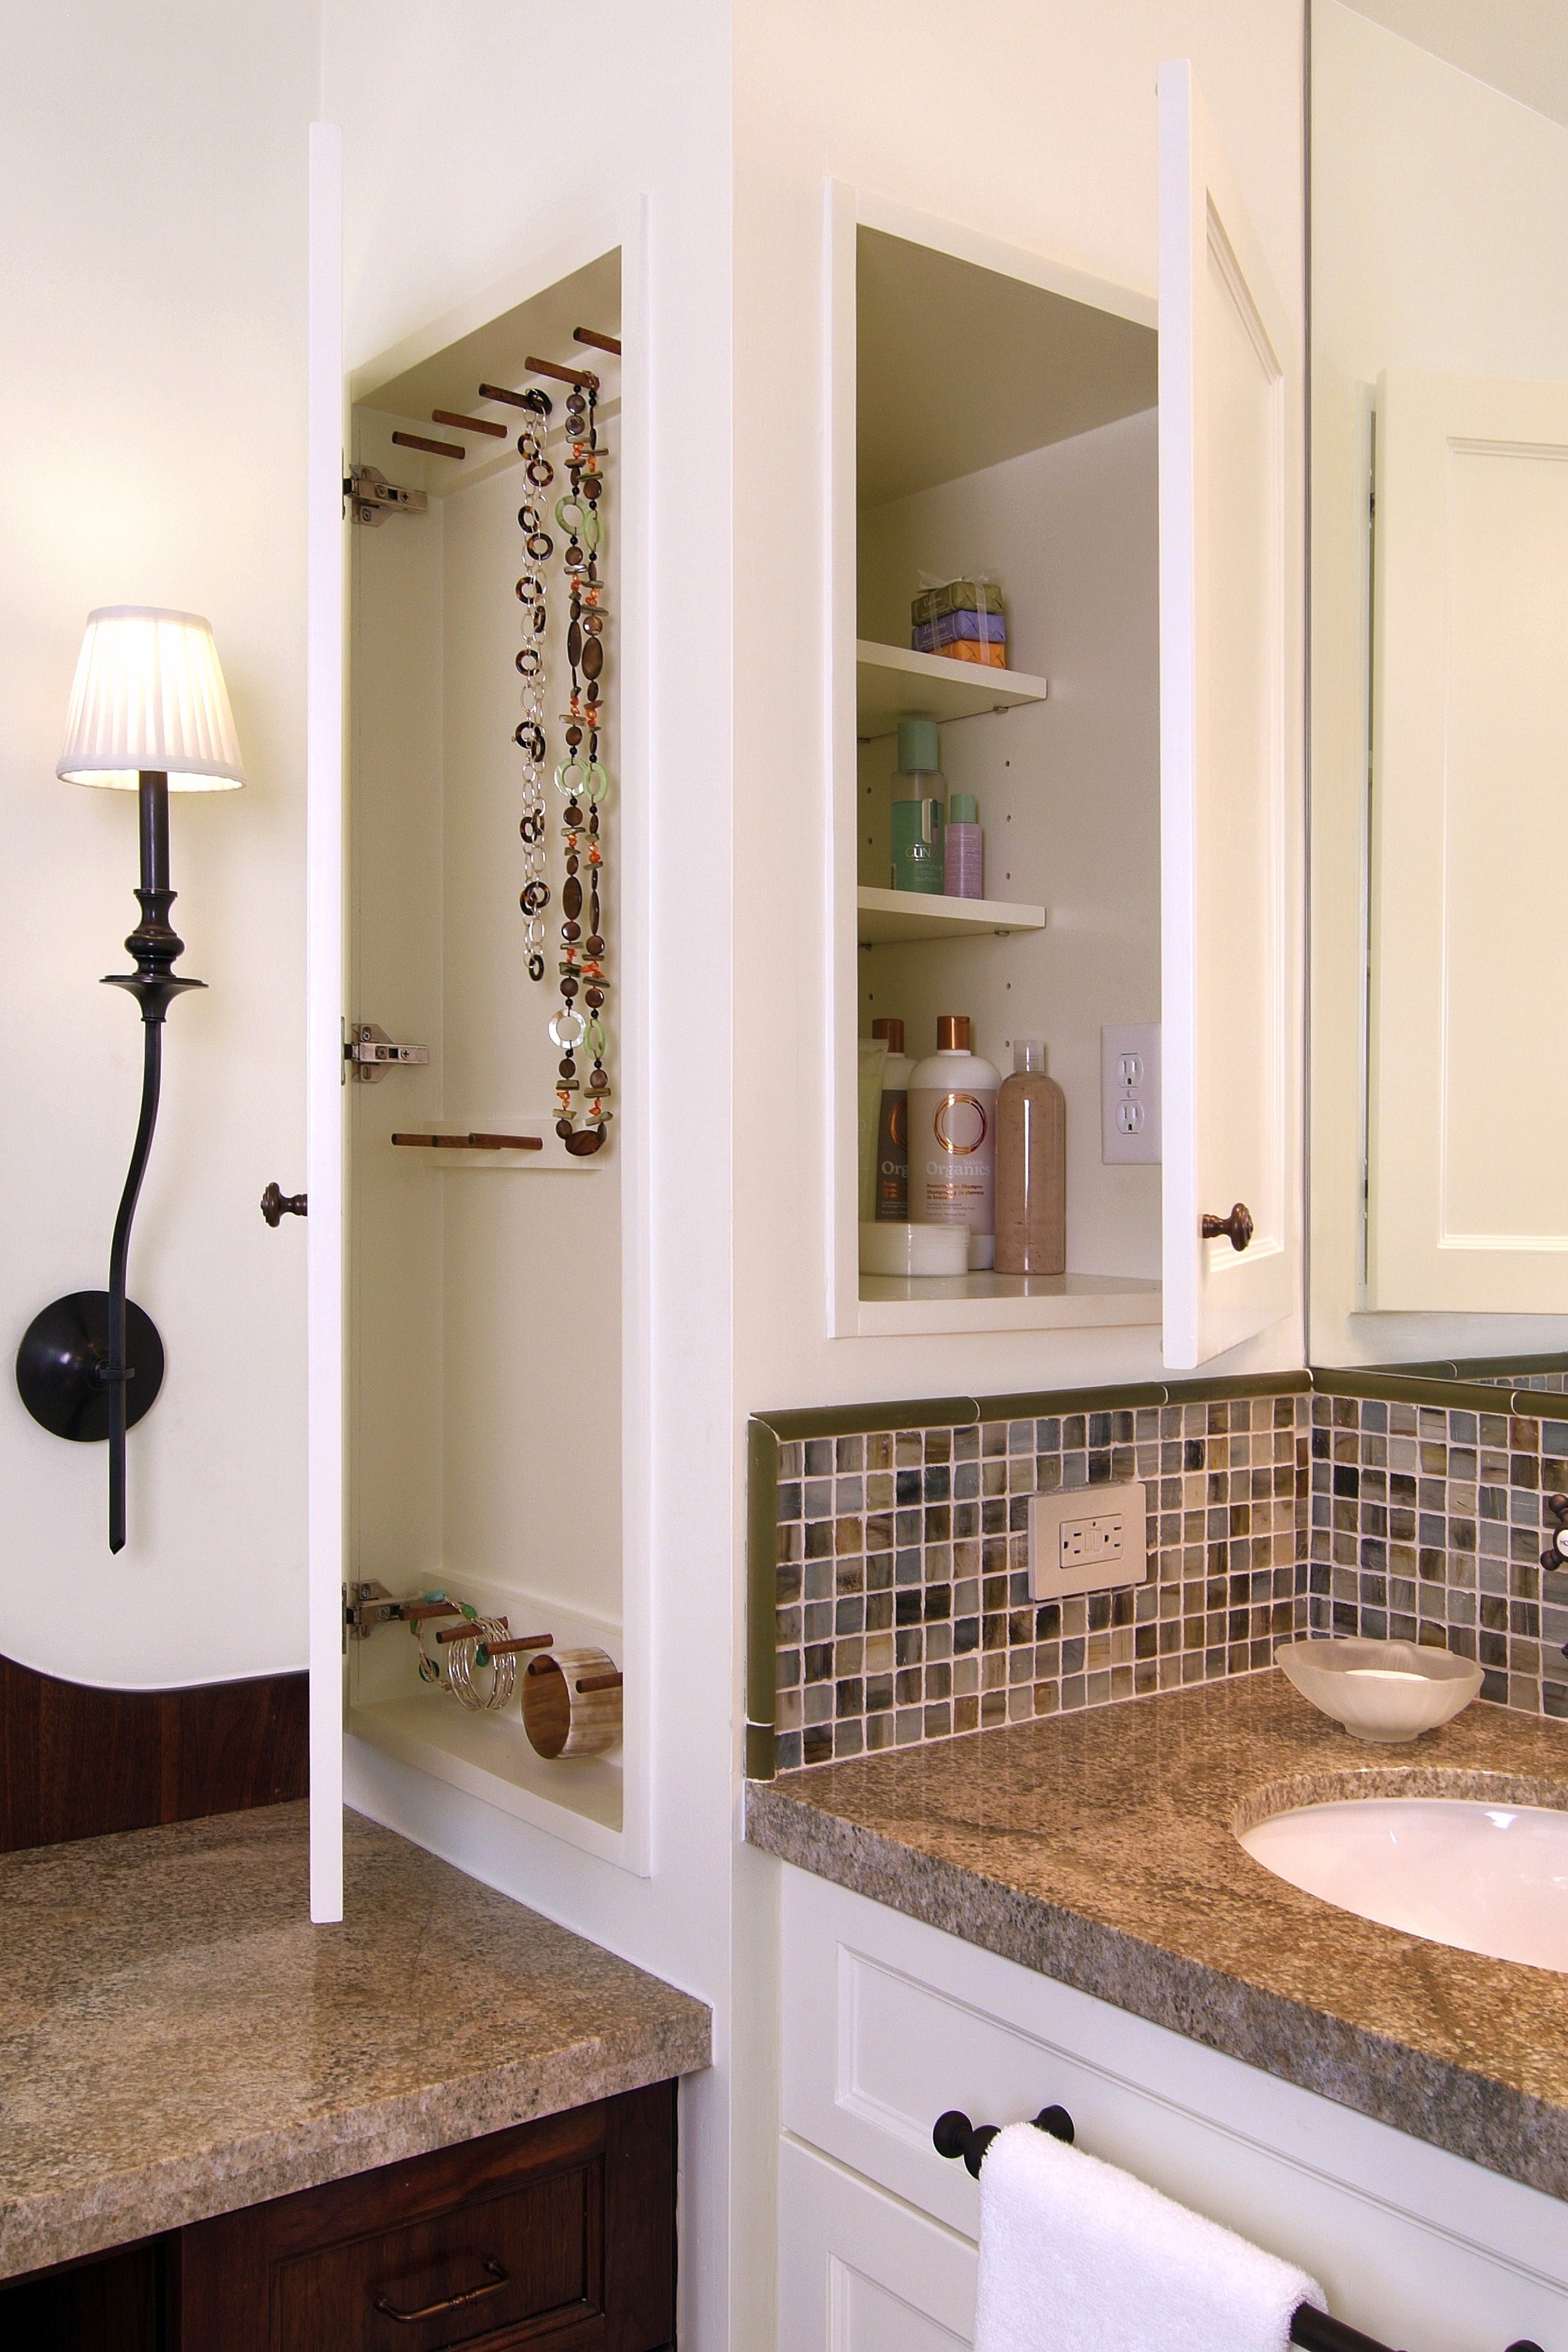
I love my outlet inside my medicine cabinet too, seen below. Something is always charging in there. Robern makes some great medicine cabinets that have outlets inside as well.
7 Tips To Tweak Your Cabinetry For Better Organization - Electrical outlet inside built-in medicine cabinet in bathroom. #bathroomstorage #organization #cabinetry
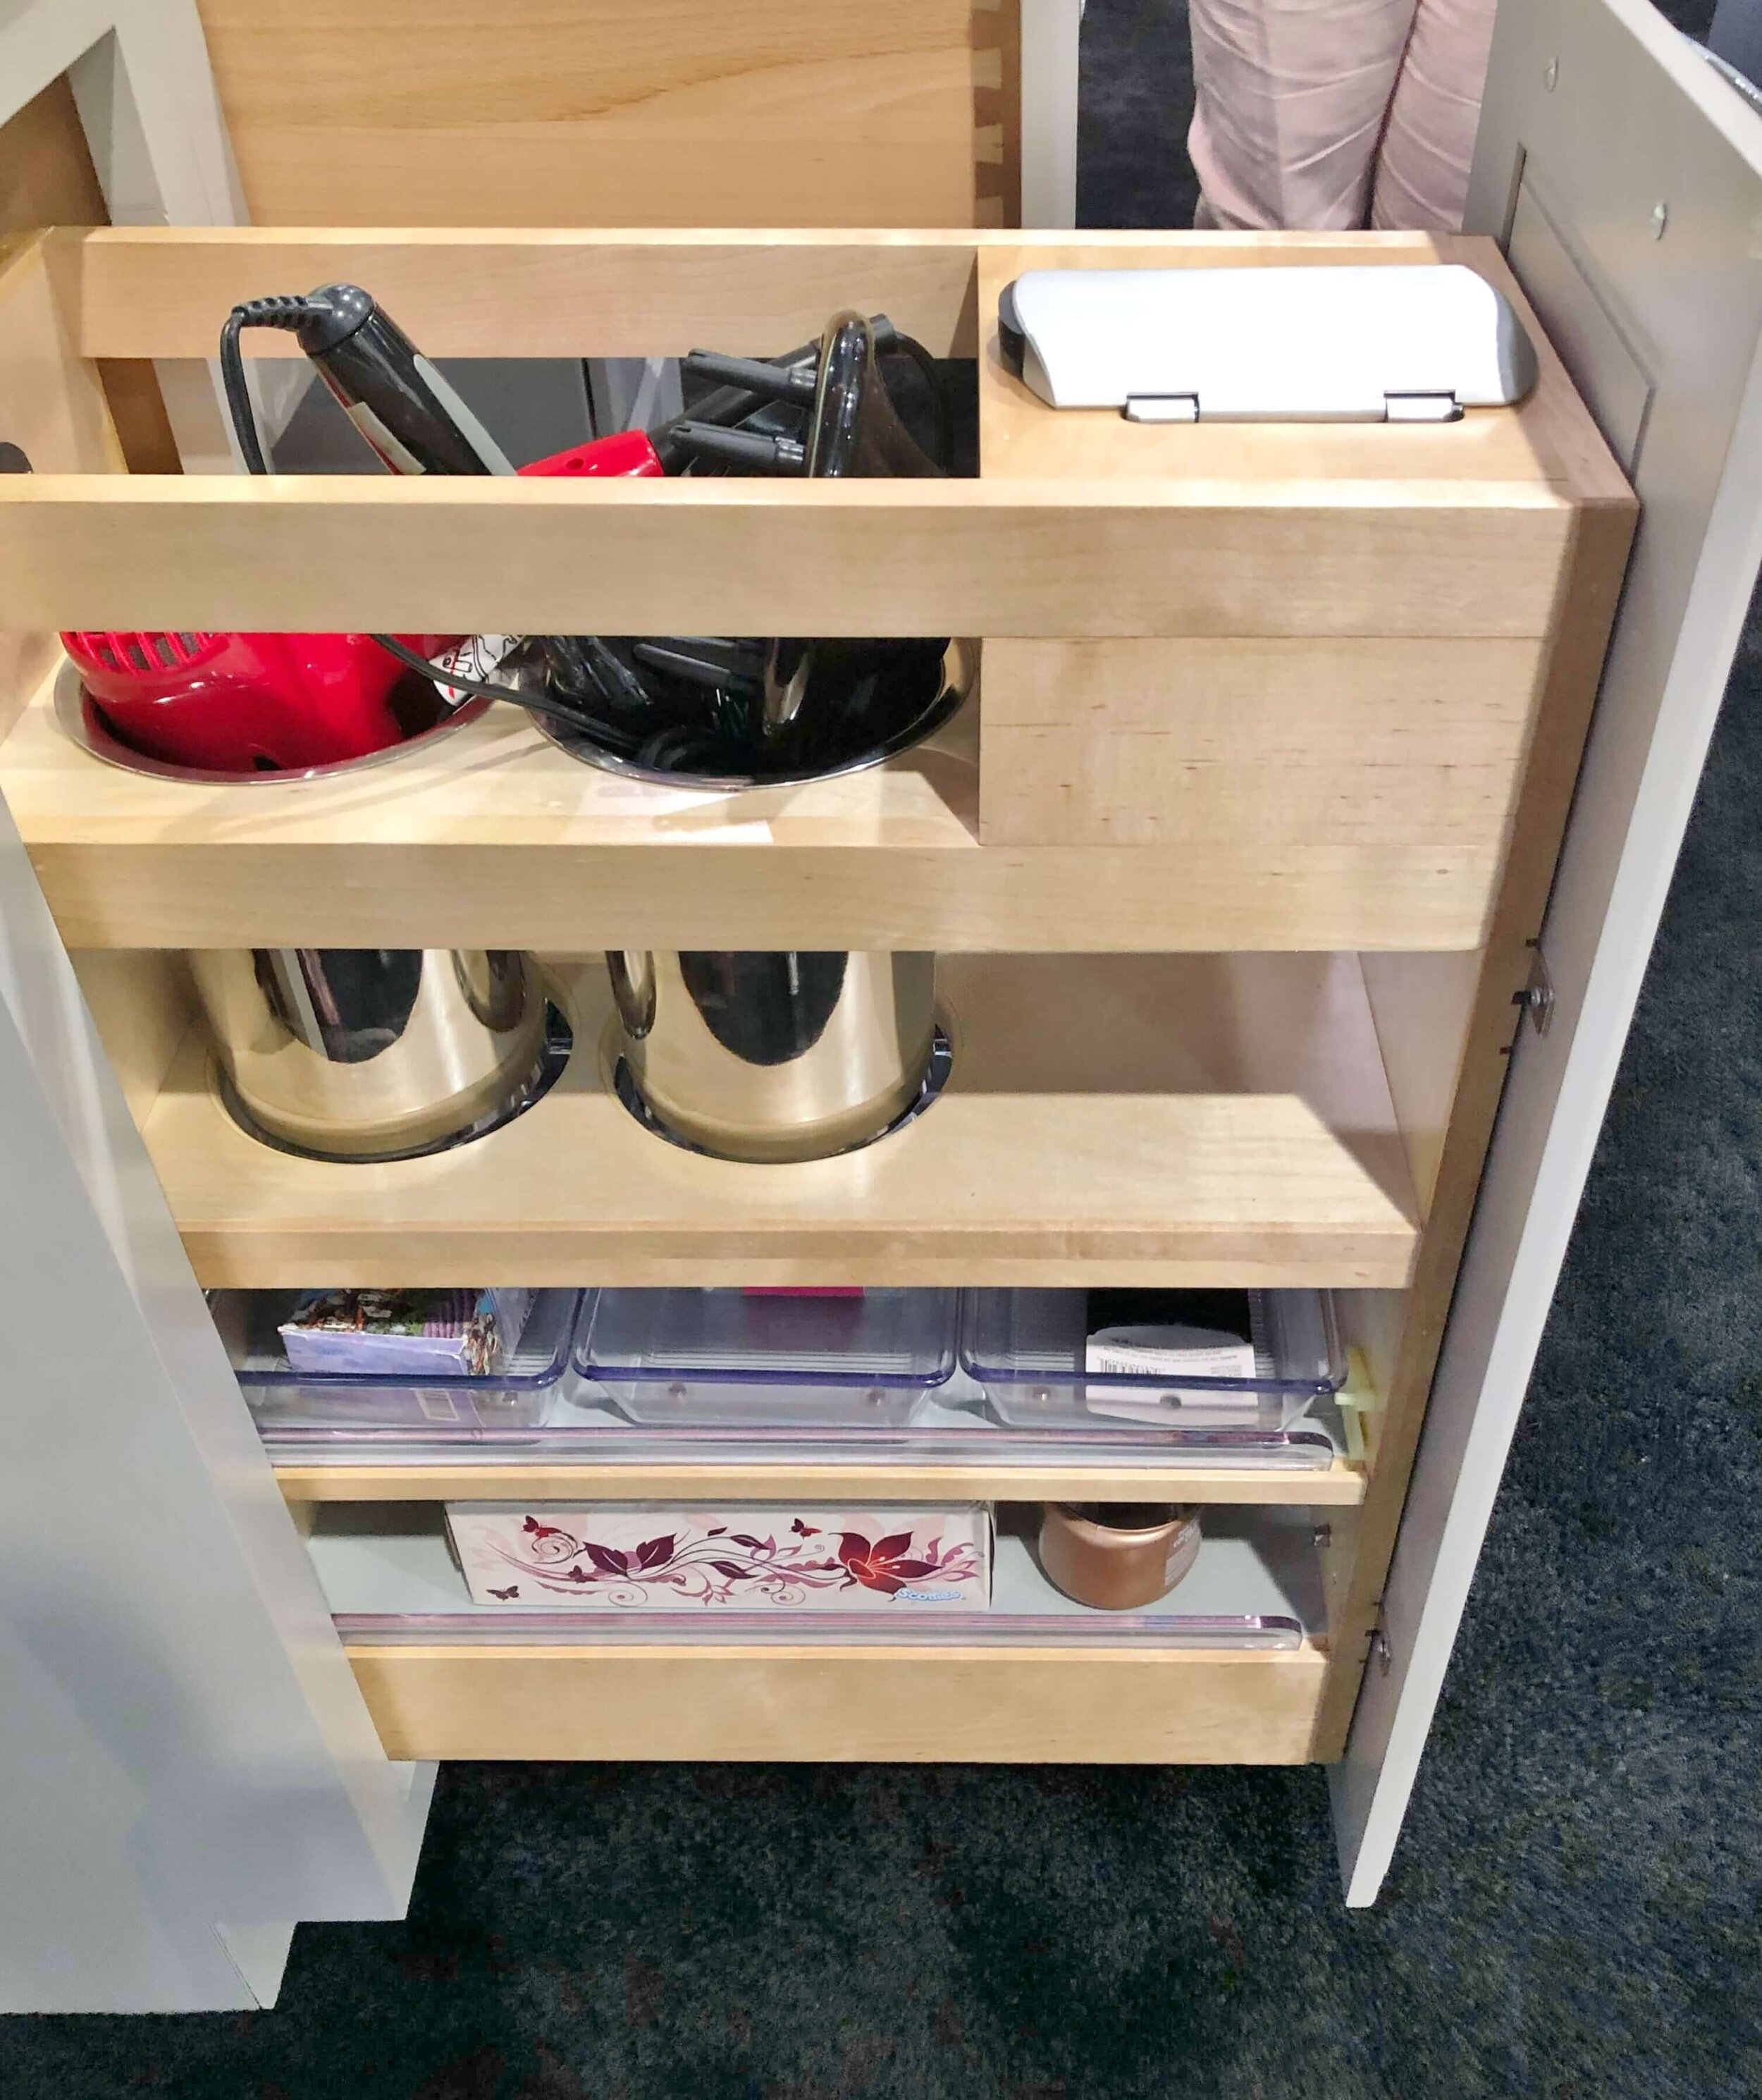
Rev-a-shelf has even more unique bathroom storage drawers to hide all your hair care devices. The outlet within is designed to pass even the most stringent local building codes.
7 Tips To Tweak Your Cabinetry For Better Organization - When lid is up and outlet in use, drawer cannot be closed. #bathroomcabinet #storage #bathroomorganization
7 Tips To Tweak Your Cabinetry For Better Organization - This handy drawer keeps your hair dryer and curling iron, etc., out of sight and contains the outlet right there for convenient use. #bathroomcabinet #storage #bathroomorganization
2 - Get more accessible storage out of your double door cabinet.
This cabinet with a center stile blocks access to shelving. #organization #cabinetry
Many cabinets have a center vertical stile (a divider) between the two doors.
I find that there is much more accessibility if you can have that vertical piece gone. You just gain such better access to your cabinet and then can move bigger dishes in and out easily. It also enables you to install some organizational products, if you desire.
If you have a center stile, then it’s highly unlikely you have cabinet doors that meet in the middle. It’s likely there’s a gap that the center stile covers.
You can cut that stile top and bottom, making nice cuts to save the center stile. Then attach that piece to one of the cabinet doors, looking just as it would have before. It then appears as a “dummy” center stile, still there when closed, covering the gap, but opens up the cabinet tremendously as it swings open with one of the doors.
Another option is to make new doors that do meet in the middle.
7 Tips To Tweak Your Cabinetry For Better Organization - Upper kitchen cabinet with no center stile works great for accessing your dishes and glassware. #cabinetorganization #kitchencabinets #organization
3 - Pull-out under the kitchen sink
It’s always hard to get under the sink, so a pull-out really helps you get access to everything you have underneath.
No matter what style of cabinetry or kitchen you may have, a double door scenario is almost always done under the sink for access to the plumbing. A single pull-out on the base of the cabinet can be super convenient.
If you have a center stile there, the removal I described above can work so that you have a big, wide pull-out.
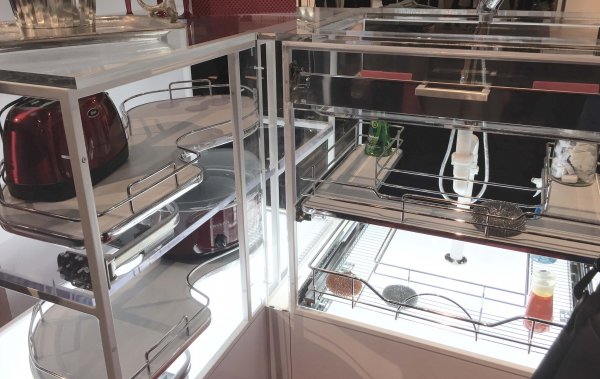
7 Tips To Tweak Your Cabinetry For Better Organization - Pull-outs from Rev-A-Shelf, seen at KBIS. Love the under-sink pull outs and dead-corner pull-outs. #cabinetorganization #kitchencabinets #organization
4 - Deep drawers have more storage space than pull-outs.
Pull-outs behind cabinet doors eat a couple of additional inches out of your storage width as they have to allow for the door swing and the pull-out mechanism. Especially in a narrow cabinet, if you're not doing vertical storage, a drawer makes better use of space than a pull-out.
7 Tips To Tweak Your Cabinetry For Better Organization - Deep drawers in kitchen cabinets gives a lot of storage and better access. #kitchencabinets #organization
7 Tips To Tweak Your Cabinetry For Better Organization - A bank of deep drawers gives you so much storage and flexibility in your kitchen. #kitchencabinets #organization
Additional Tip: If you are doing deep drawers or pull-outs, stay under 36” wide, as they will begin to sag over time, even with heavy duty glides.
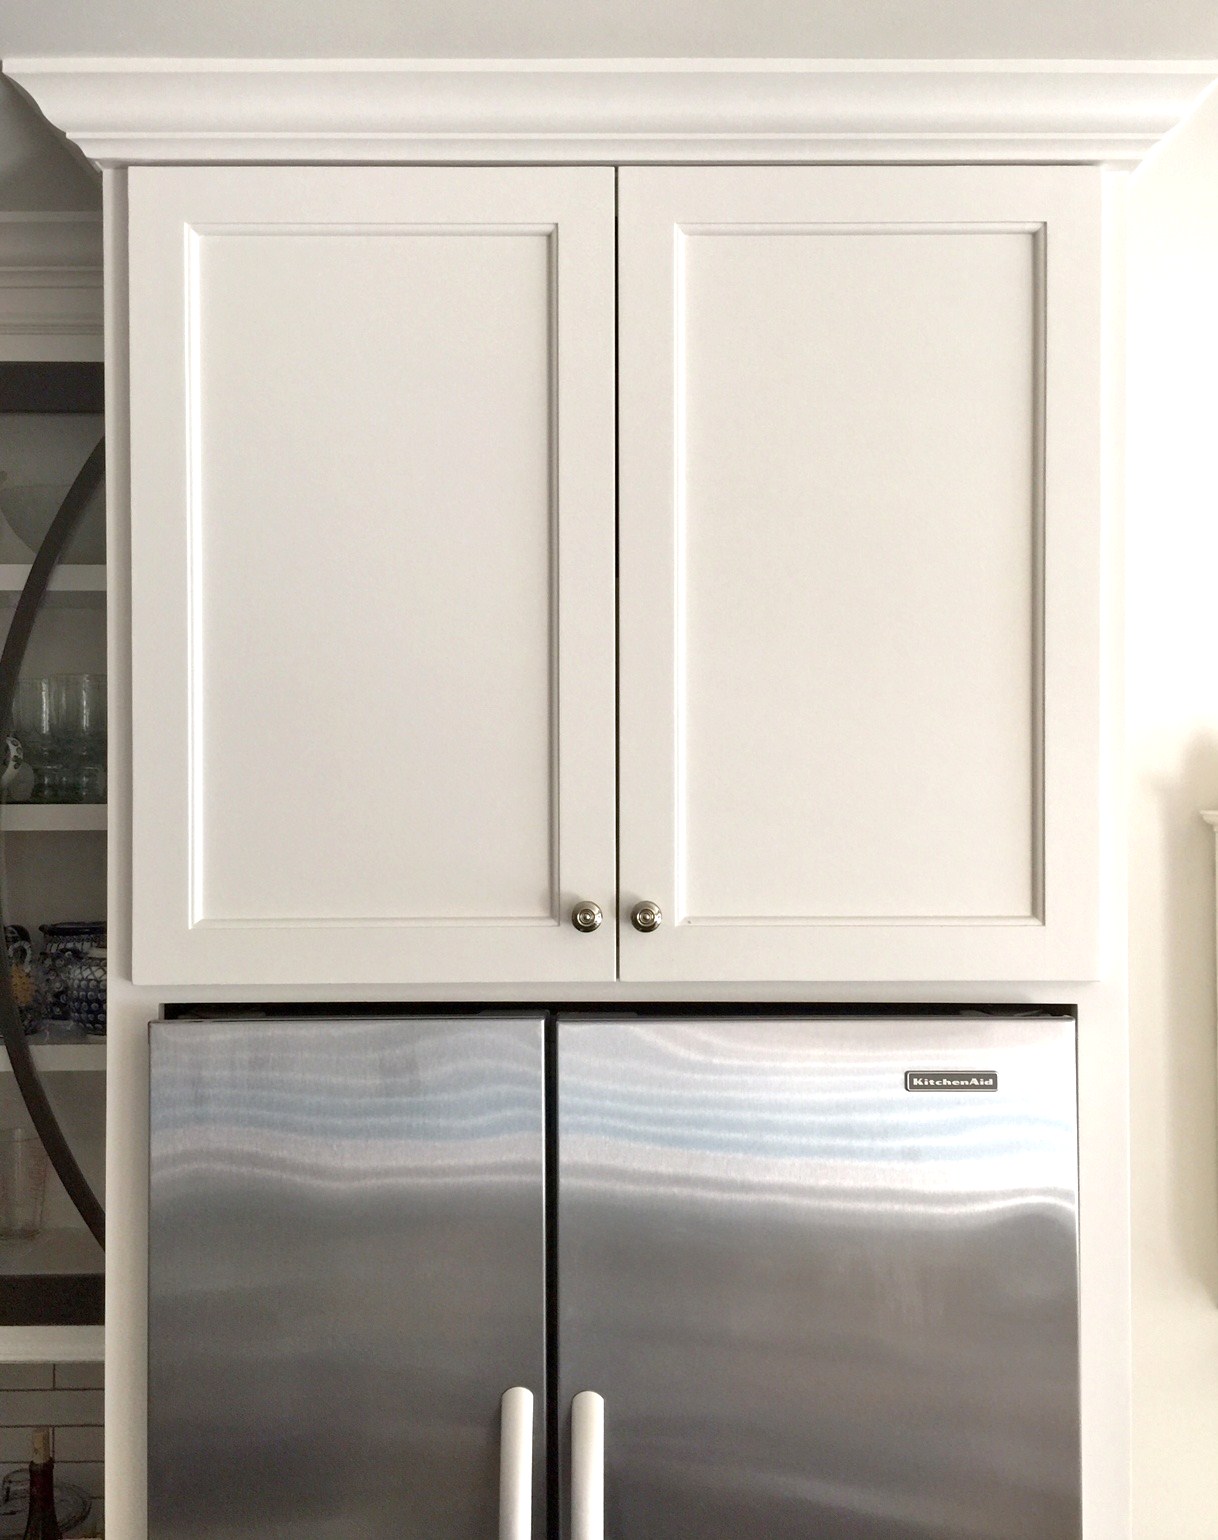
5 - Modify your overhead cabinet above a refrigerator if it’s tiny and unuseful.
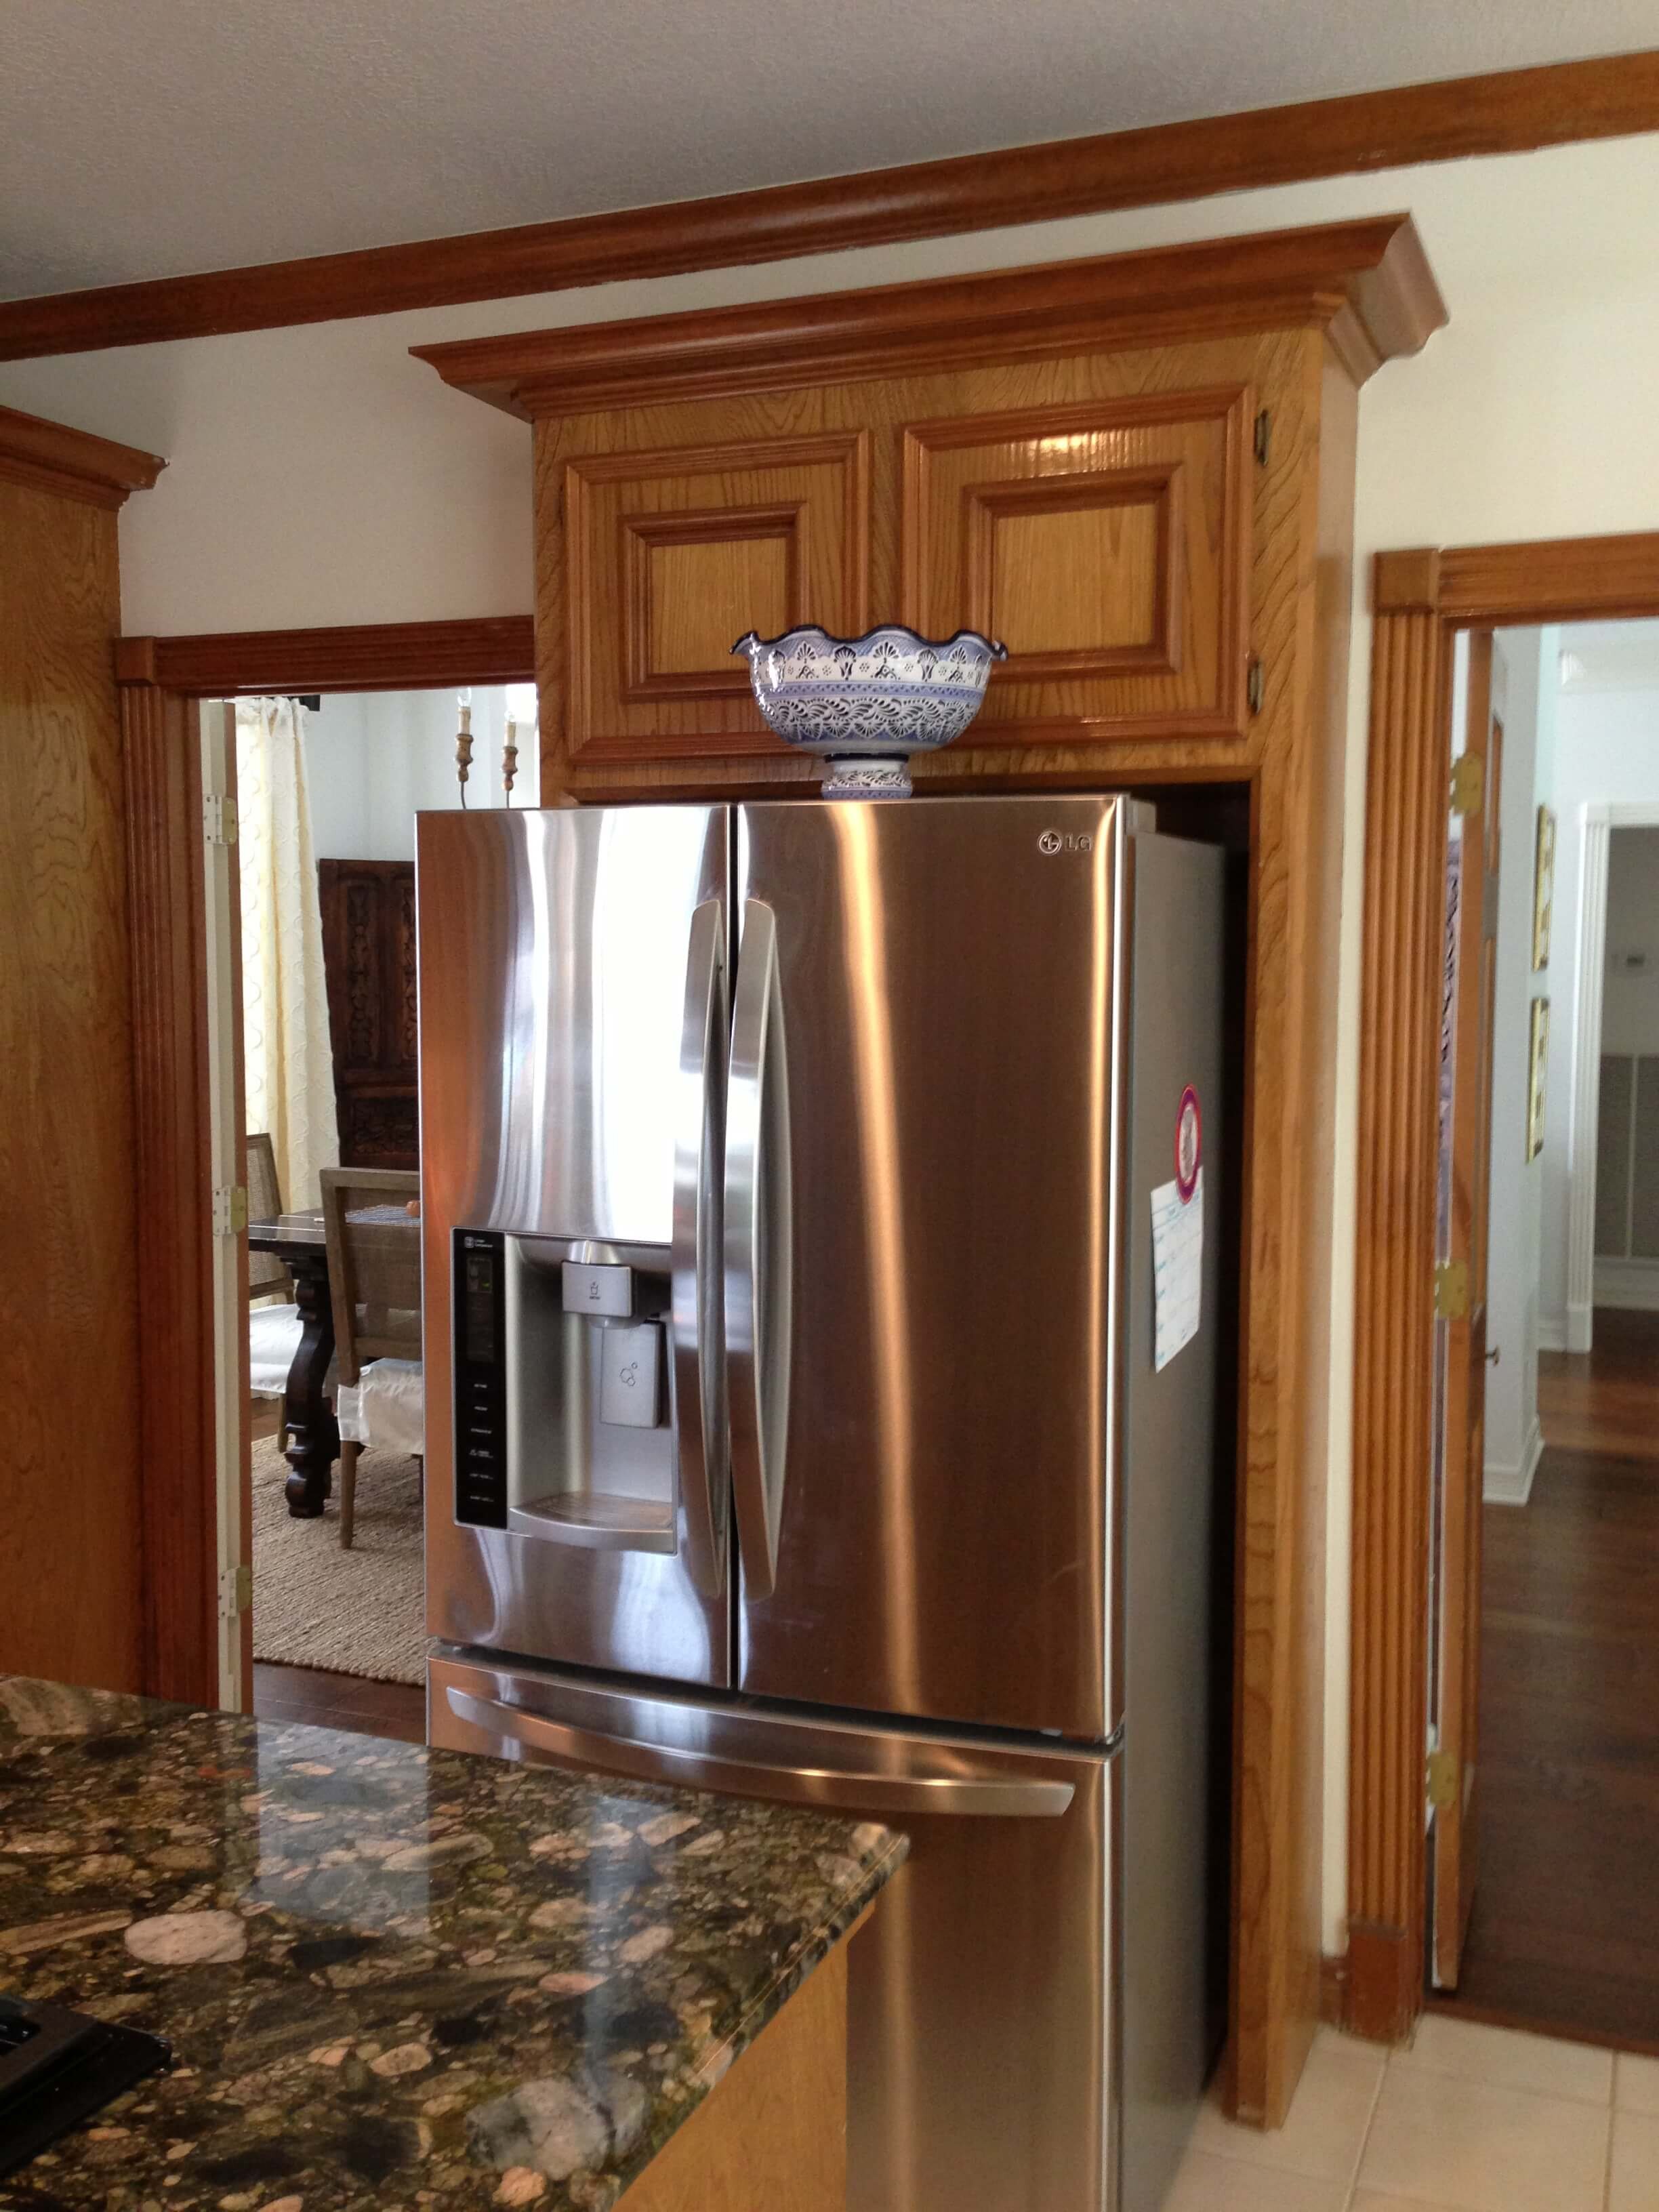
BEFORE - These old cabinets above the fridge in this remodel, were basically unusable as they were too small and too hard to get to. #kitchencabinets
If you have a cabinet above your frig that is 12” deep like the rest of your kitchen cabinets, it’s likely not doing you much good. Many times people stack items on top of the refrigerator in front of it and it’s so hard to get to back there, that you don’t even remember what’s there. The cabinet usually ends up being tiny too, especially if it has a center stile, so that it’s pretty much unusable except for odd small items you really don’t need.
I prefer to build in a refrigerator with a full cabinet, bringing the storage all the way out to the face of the refrigerator, using that space many times, for trays or platters with vertical dividers. Check out more of my beautiful kitchen storage HERE.
7 Tips To Tweak Your Cabinetry For Better Organization | AFTER - This clean and accessible look is so much more desirable for storage and access. #organization #cabinetry #kitchencabinets
7 Tips To Tweak Your Cabinetry For Better Organization | AFTER PIC - I love the accessible storage that a refrigerator encased in cabinetry can bring to a kitchen. #organization #cabinetry #kitchencabinets
Here’s another before and after, below, this one with display space created above the fridge in the cabinet. It’s so much better for access to have it flush with the depth of the fridge.
7 Tips To Tweak Your Cabinetry For Better Organization | BEFORE - Useless tiny cabinet above fridge with limited accessibility. #kitchencabinets
7 Tips To Tweak Your Cabinetry For Better Organization | AFTER - Display space created in cabinet above fridge in kitchen remodel | Designer, Carla Aston | Photo, Tori Aston #kitchencabinets #organization #cabinetry
If you can’t do that and simply want to make your storage more useful, you can remove the tiny cabinet.
Typical pre-made cabinets, even custom cabinets, are built in boxes and then installed directly on the wall. Many times they are just butted up to each other, not even attached. Mouldings and trim are then added with finish nails, so it’s quite easy to remove that cabinet by gently prying off the mouldings and trim, saving it, of course, then unscrewing the little cabinet from the wall and taking it down. I highlight more about this in my downloadable pdf, here.
Typically the sides of the adjacent cabinet are finished, so no need to worry about exposing something not finished or painted. Then the existing moulding can be cut to fit and return back to the wall beside the cabinets remaining on the wall.
So, what to do with that space then?
I have done several things in the past, like this cabinet below.
7 Tips To Tweak Your Cabinetry For Better Organization | Special box cabinet designed and built for display above the refrigerator. Designer: Carla Aston #woodkitchen #openshelves #kitchencabinets
Here, we built a new box cabinet that was taller and deeper than the typical cabinetry. It was also slightly more narrow than the refrigerator, so that it purposefully looked like an accent piece on it’s own. It was painted a color that contrasted with the rest of the cabinetry, again, to make it appear as an intentional change or accent.
That space for the fridge really wasn’t wide enough for a tall, fully encasing cabinet, and we wanted a less expensive option too.
We did an adjustable open shelf in the middle and topped it with a crown. Once painted, it became a nice place for display of some favorite kitchen ceramics.
6 - Tuck your garbage can into the cabinet for a tidier look to your kitchen.
So, maybe you aren’t remodeling your kitchen anytime soon but are dying to get that trash can stashed away. You also don’t want to have a tiny, short trash can in the kitchen, but need a full height kitchen garbage can to handle your needs.
Most tall trash cans will fit underneath a standard 36” countertop even in a drawer situation. If you have a 20” or wider cabinet with a door below and drawer above, you can convert that section into a concealed trash drawer.
This trash drawer is basically a platform with short box around the base so that the trash can fits in. Use a heavy duty, full extension glide so that you can have complete access to the trash can.
7 Tips To Tweak Your Cabinetry For Better Organization |An ample trash drawer in this kitchen has room for a large trash can and storage for trash bags, below. #organization #cabinetry #trashdrawer
Of course, you can buy one of these great drawers from Rev-A-Shelf, and install it into your existing cabinet in the way described above. This one debuted at KBIS a few years ago, all stainless with heavy duty glides.
Stainless steel trash drawer as seen at KBIS from Rev-A-Shelf #organization #cabinetry #trashdrawer
7 - Organize those dead corners.
One of the most poorly used spaces in a kitchen can be the dead corner space, as shown below.
Here’s a recent job of mine with a handy corner pivot system installed. It swings out and then pulls out as well, for full access.
Lazy susan pull out in a cabinet’s dead corner helps gain more access. #organization #cabinetry
Lazy susan pull out in a cabinet’s dead corner helps gain more access. #organization #cabinetry
It’s time to get your cabinets organized in the new year! Take a peek at some of the cool cabinet storage products I’ve linked below. I’ve also got some great bathroom storage ideas here.
I have some cool storage products from Rev-A-Shelf linked for you below.
These can really help organize your cabinets and gain more accessibility for hard-to-reach spaces.
My blog contains some affiliate links like the ones below. Any purchases you make through them are at no additional charge to you, but render me a small percentage. They are much appreciated and make this blog possible. :-)
Follow me on Instagram as I head to KBIS 2020 in mid-January! I’m going to hit up the Rev-a-shelf booth to see more of their new products plus lots more!!!
And pin this post to Pinterest to save all these ideas for your next cabinetry update!

